S6
How to improve your image quality when scanning young children.
Helle Juhl Simonsen1, Karina Elin Segers2, Eduardo Hansen2, Mads Rostock2, and Ulrich Lindberg1
1Functional Imaging Unit, Dept. of Clinical Physiology, Nuclear Medicine and PET, Rigshospitalet, Glostrup, Glostrup, Denmark, 2Department of Radiology, Rigshospitalet, Glostrup, Glostrup, Denmark
1Functional Imaging Unit, Dept. of Clinical Physiology, Nuclear Medicine and PET, Rigshospitalet, Glostrup, Glostrup, Denmark, 2Department of Radiology, Rigshospitalet, Glostrup, Glostrup, Denmark
Synopsis
Our research unit became in the end of 2018, involved in a major research project, where we over a period of 3 years shall MRI scan a cohort of 600, 10-year-old children. The MR scanning’s results, will be a part of a larger project, where the children have been followed with different test since birth. For the project, it will be very important that we get high image quality. Scanning children without sedation can be a bit of a challenge. We shortened our research protocol as much as possible and found a cheap solution to entertain children during the scan.
Background
Our research unit became in the end of 2018, involved in a major research project, where we over a period of 3 years shall MRI scan a cohort of 600, 10-year-old children. The MR scanning’s results, will be a part of a larger project, where the children have been followed with different test since birth. For the project, it will be very important that we get high image quality.Methods
All the MRI scans will be performed on our 3T upgraded Philips scanner (Achieva magnet, Ingenia software and with a d-Stream system), equipped with a 32-element receive head coil and MultiTransmit parallel RF transmission. We started by setting up the MRI scan protocol, with the sequences that we wish to scan. The first test scans were performed. We soon realized that the protocol was too long. We experienced that 10 years old children without sedation, can leigh still in the scanner bore for a maximum of 30 minutes. The protocol was reduced. Despite shorter scan time, image quality was still not optimal, due to motion artefacts. After 10 minutes, the children began to get bored and ask about how long scan time there were left. If you could keep the children's attention, for example, by showing a movie during the MRI examination, you may improve the image quality. MRI scanner companies offer various MRI in-bore solutions, e.g. screens where video can be displayed. These solutions are usually very expensive and not an option, when you have a limited budget. During our last scanner upgrade, we had a pipe inserted into the wall between the preparation cabin and the scanner room, in order to set up a video projector at a later time. A good quality video projector was now purchased and placed in the changing cabin (fig.1a). A home-made display screen was made of plastic tubes and good-quality canvas bought in a local store. The screen is stabilized at the end of the scanner bore with sandbags. The image is centered from the projector to the screen by using a mirror (fig.1a, b). A mirror on the head coil, make it possible to see the screen, when lying in the scanner (fig.2). In addition to our setup with the video projector, we have a 3D stereo vision system, TracInnovations´ Tracoline, which monitors and captures movements online. Via a small camera attached to the head coil, you will get a 3D image of the child’s head shown on a computer screen and a real-time motion curve (fig.3). If the children move their head too much, an alarm will appear. You must then decide whether you should continue the scanning or stop the sequence, talk to the child and then start over again. Before scanning, a medical student talks to the children and among other things show them a MR image of a head with and without movement. They are told that if we get a nice image of their head, they will get a diploma with their own picture, telling that they have been successfully MR scanned. When the children come to the scanner room, the technologist will say: “Hallo, I am the one who controls the motor of the machine. I will be sitting in the control tower just on the other side of the window. Every time I start the motor, I will call you up from the control tower and tell you how long time the motor will be noisy. If you have any problems while the motor is working you can call the control tower by touching this ball. If you press the ball, I will answer you promptly from the control tower. Are you ready to go in and see the video film?”Results
With our new set up, we have now about 80 successfully completed scans, 2 children could not go into the scanner due to claustrophobia; one of those came back on another day, where she successfully completed the scan. When having the child’s attention to the video screen, only few children must have a sequence repeated. The real-time motion curve shows nearly no motion for all subjects. The curve will be stored in the subject’s reports, for later documentation.Conclusion
Our setup shows that by engaging the children before scanning and by entertaining them with movies during the scan, the image quality has increased. At the same time, we have shown that we were able to keep the budget low, by purchasing a projector ourselves and by building our own screen. In addition the projector and screen can be used for fMRI studies and for claustrophobic patients.Acknowledgements
No acknowledgement found.References
No reference found.Figures
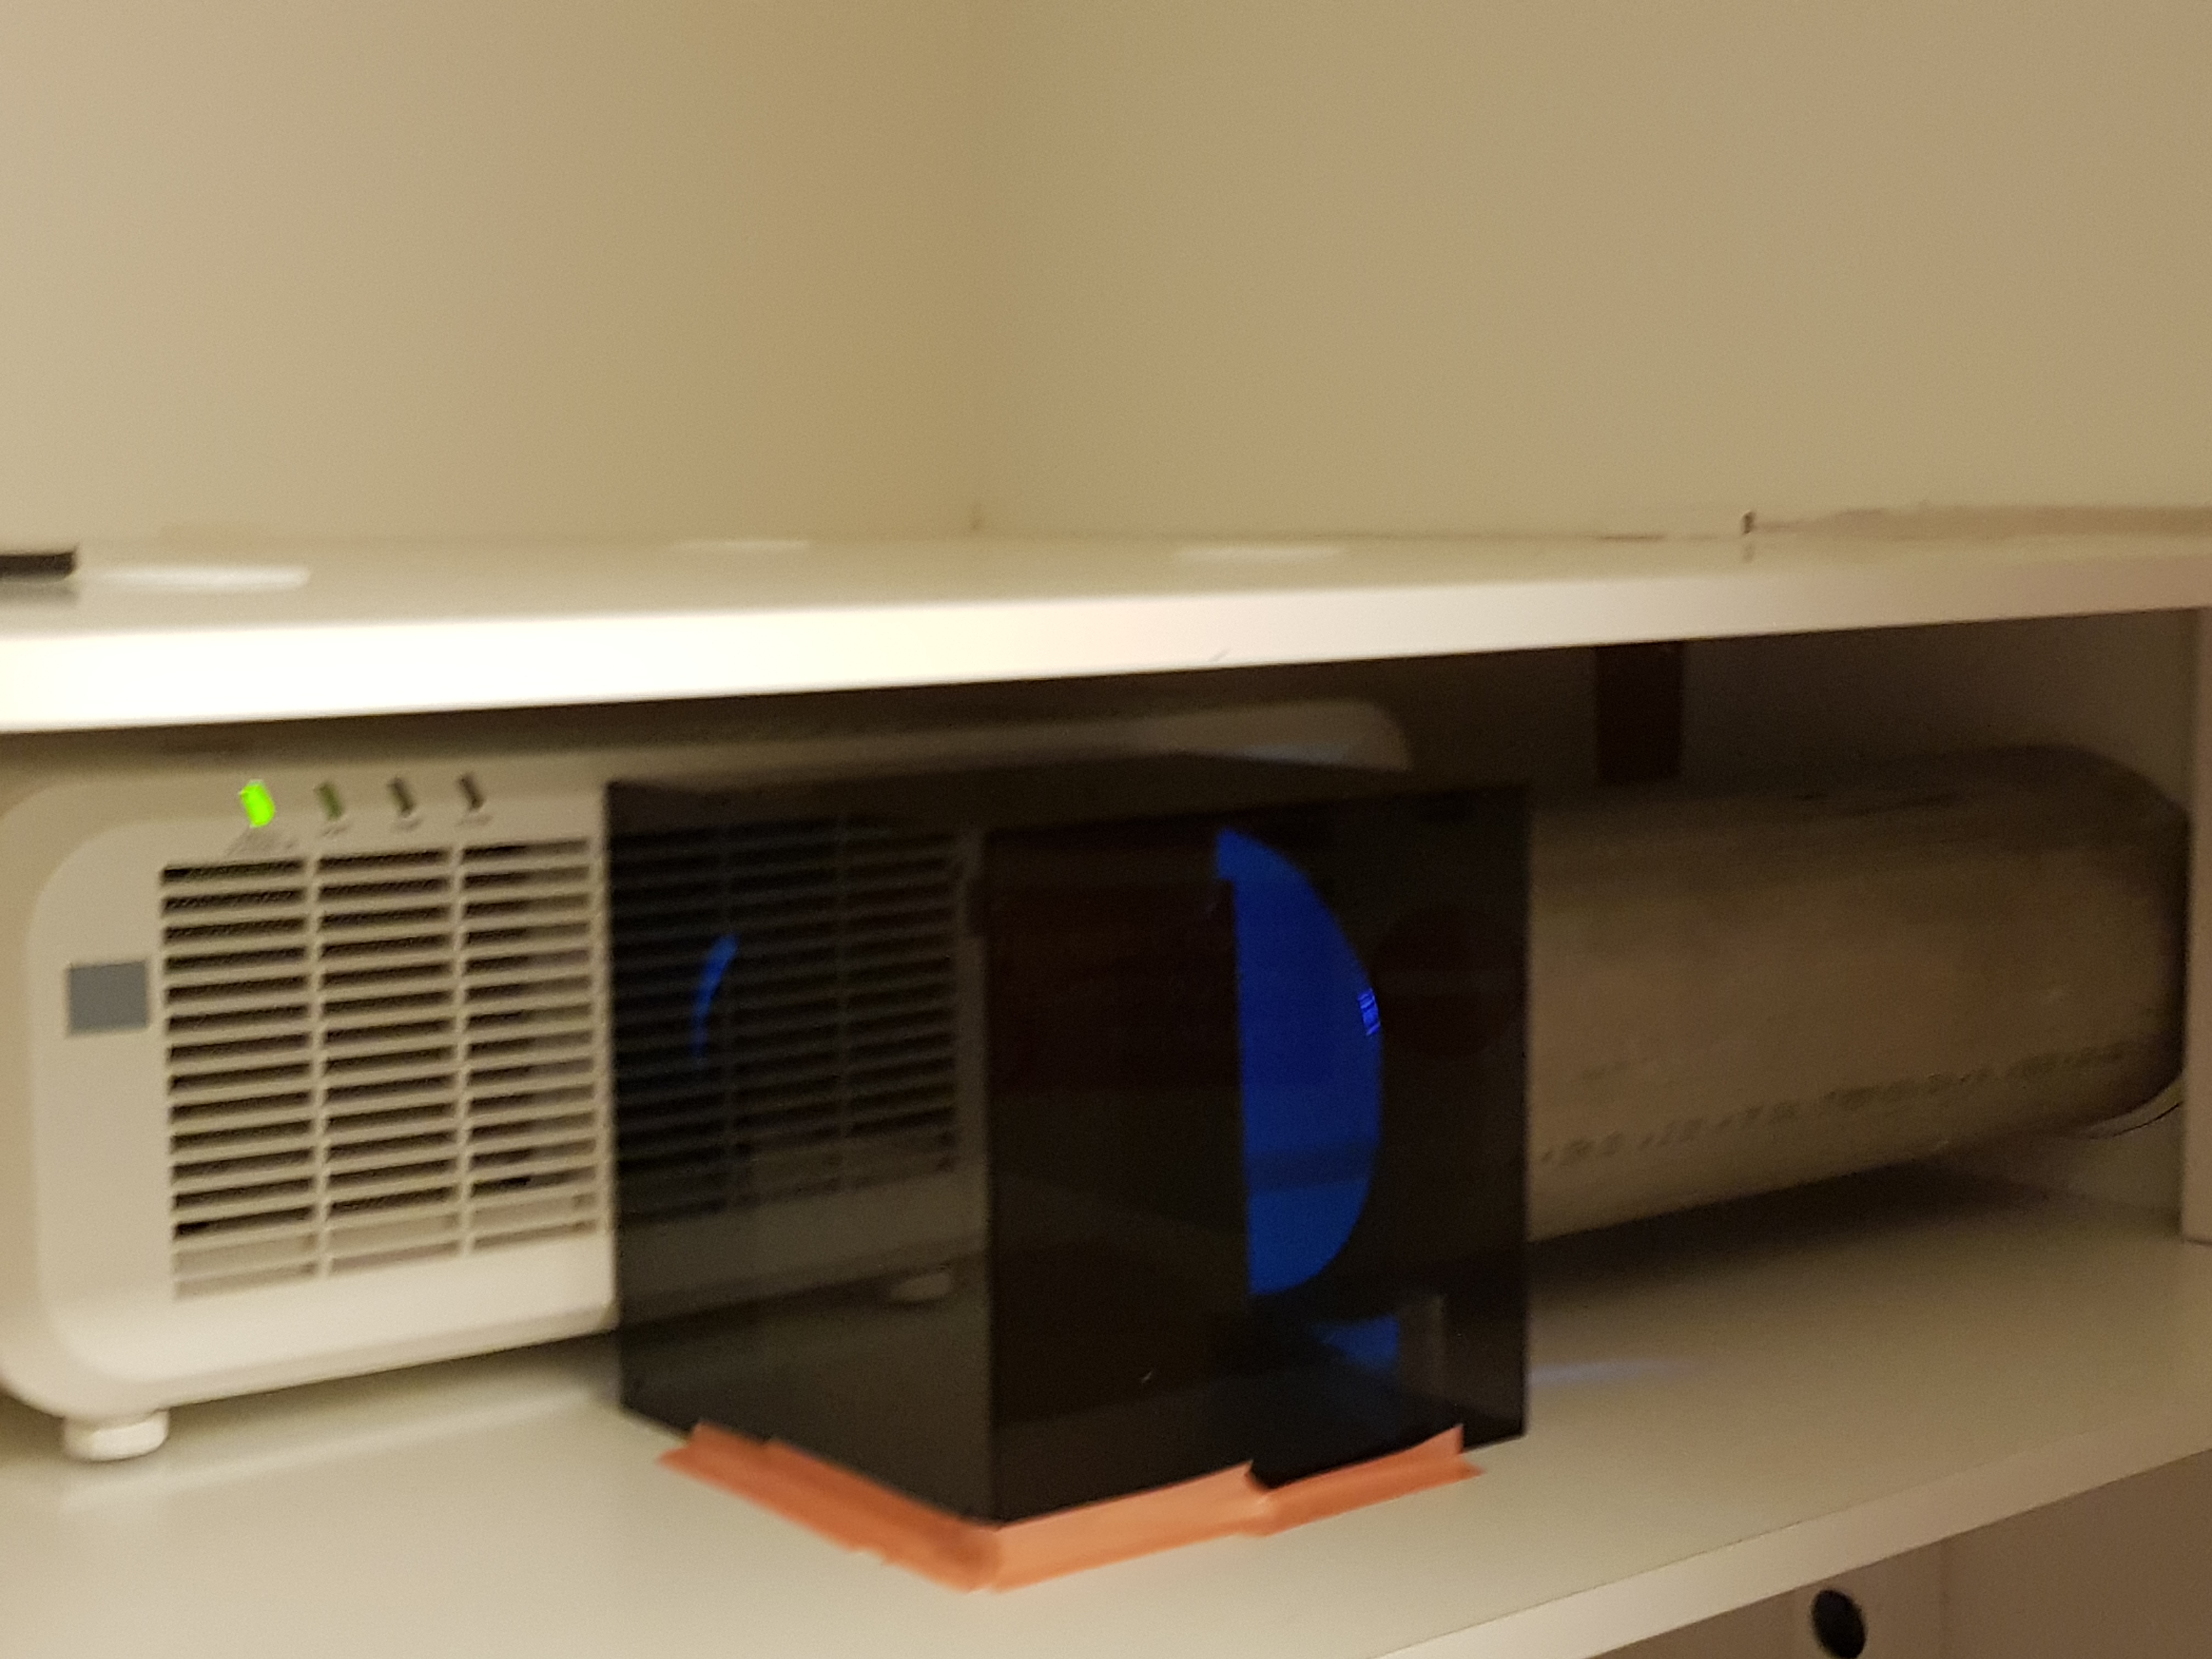
Fig 1a Setup of the video projector and mirror
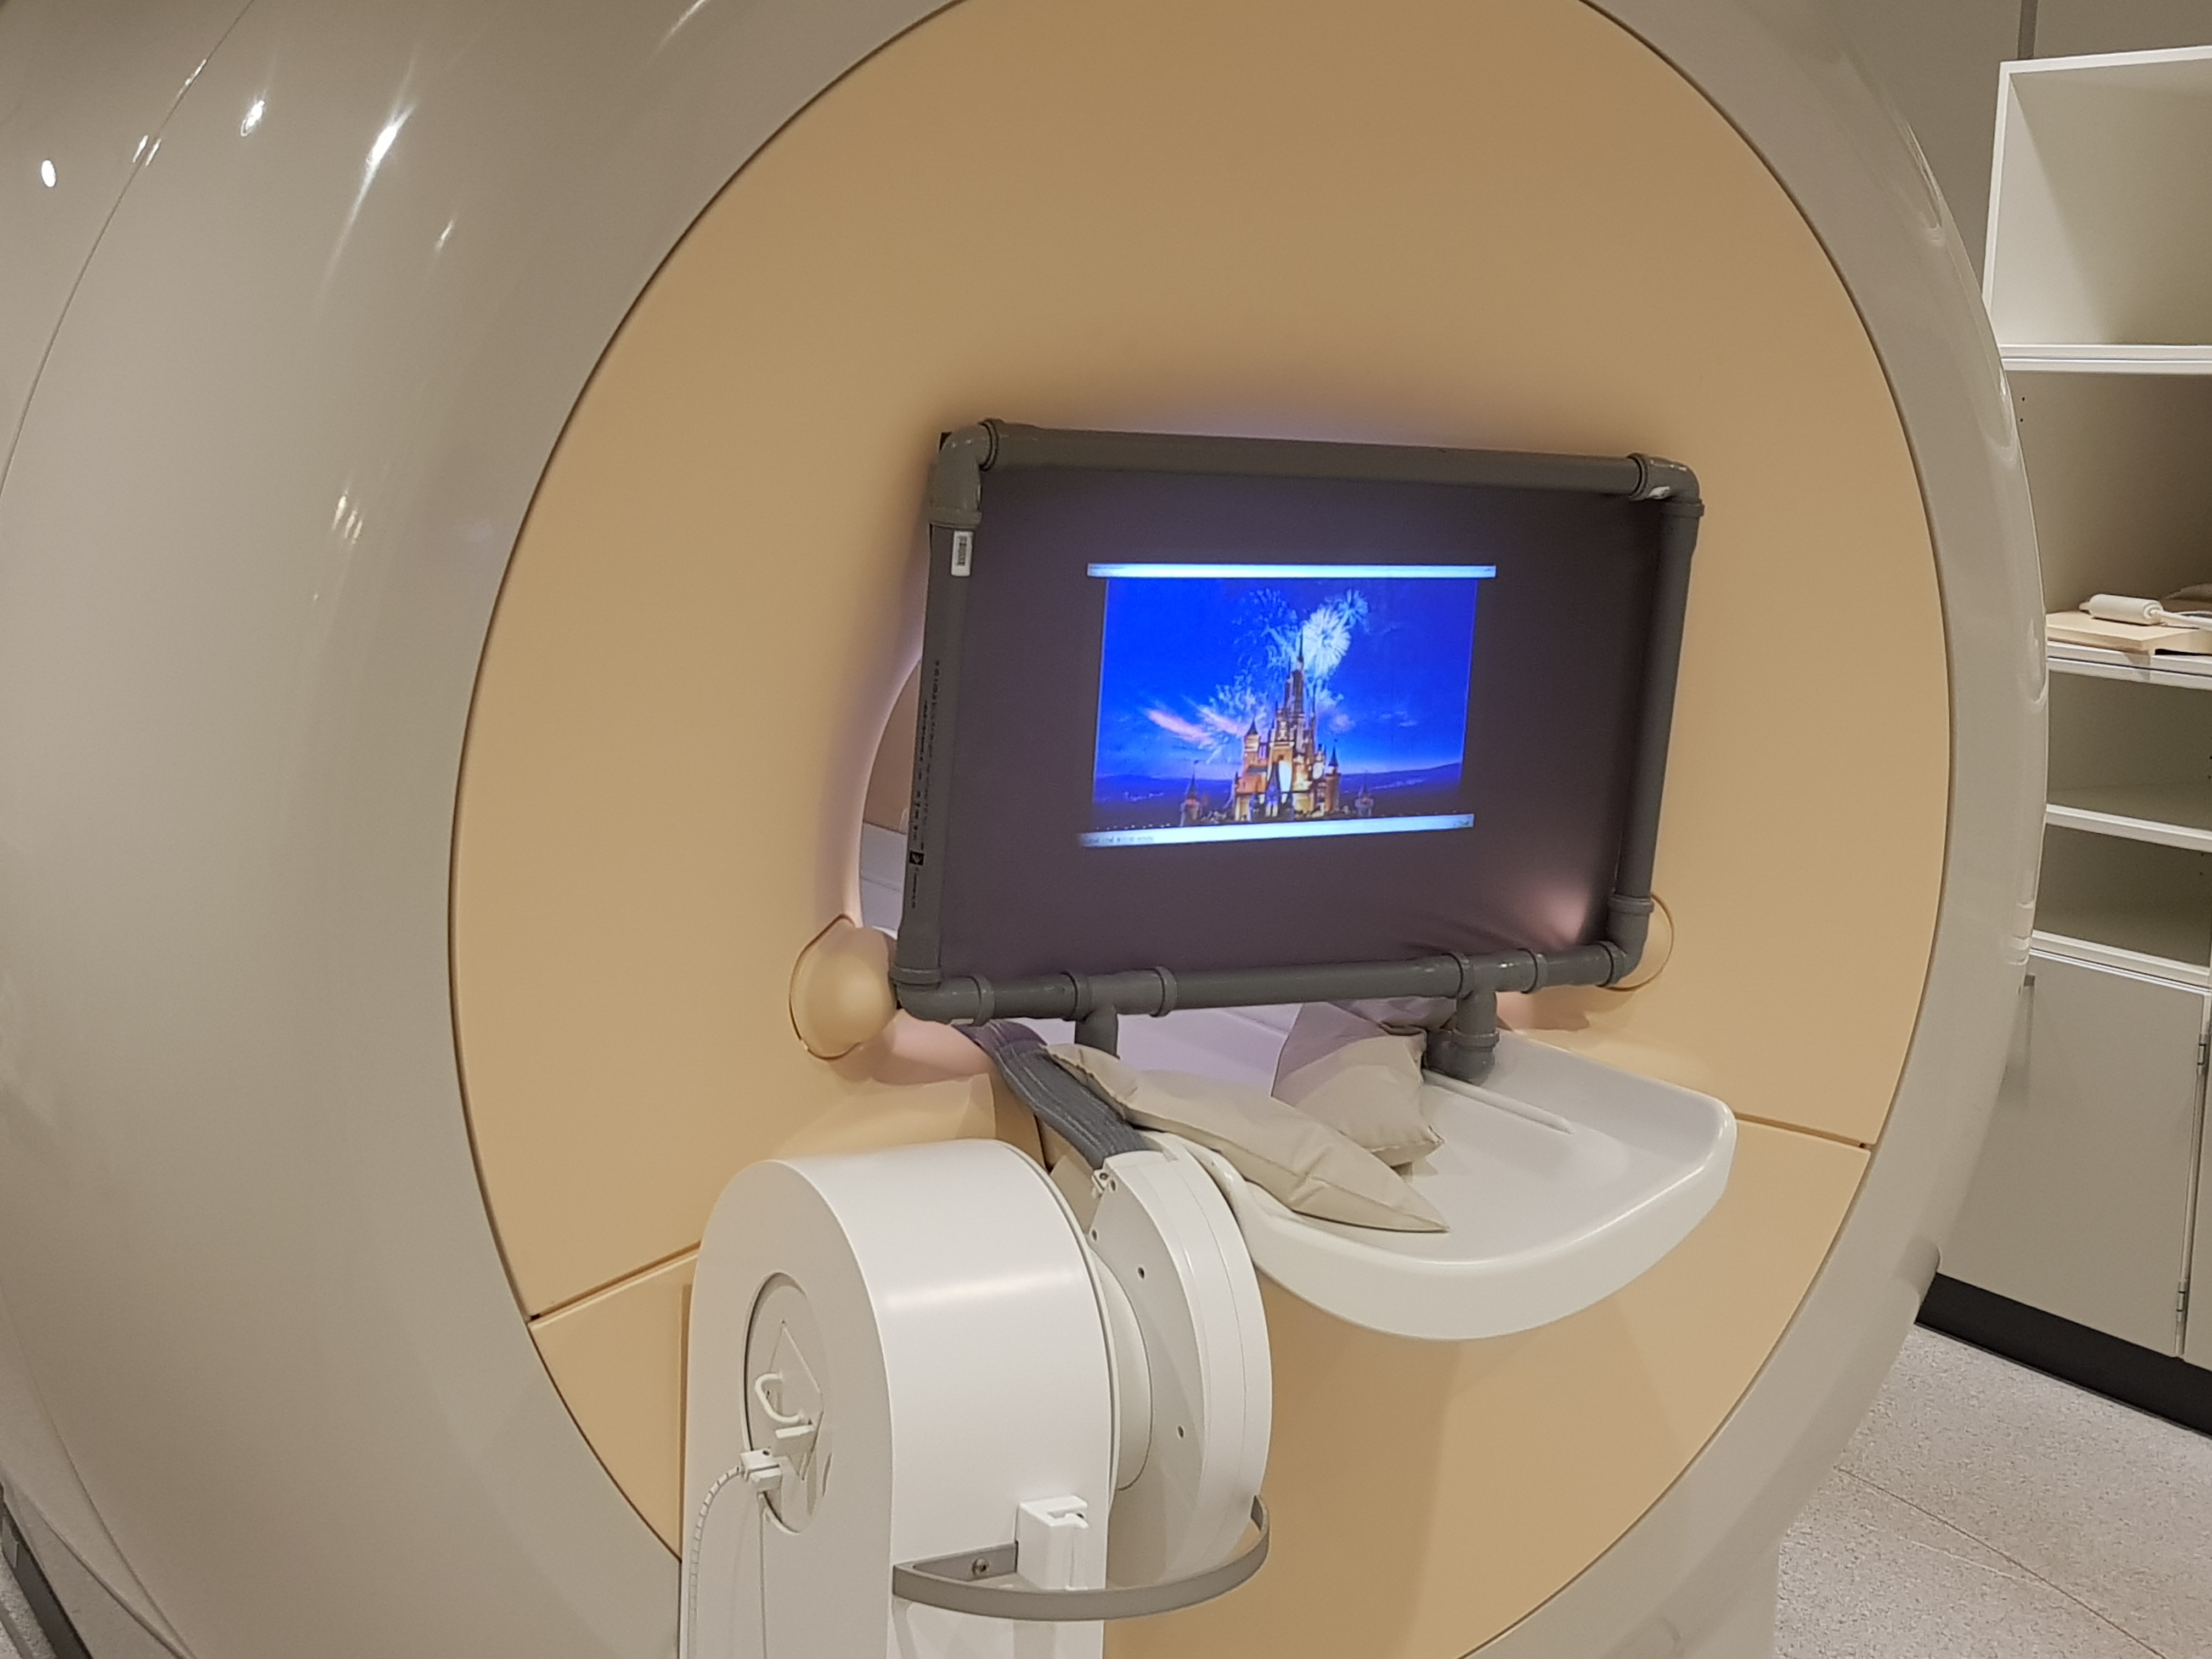
Fig1b Homemade
display screen, stabilized with sandbags
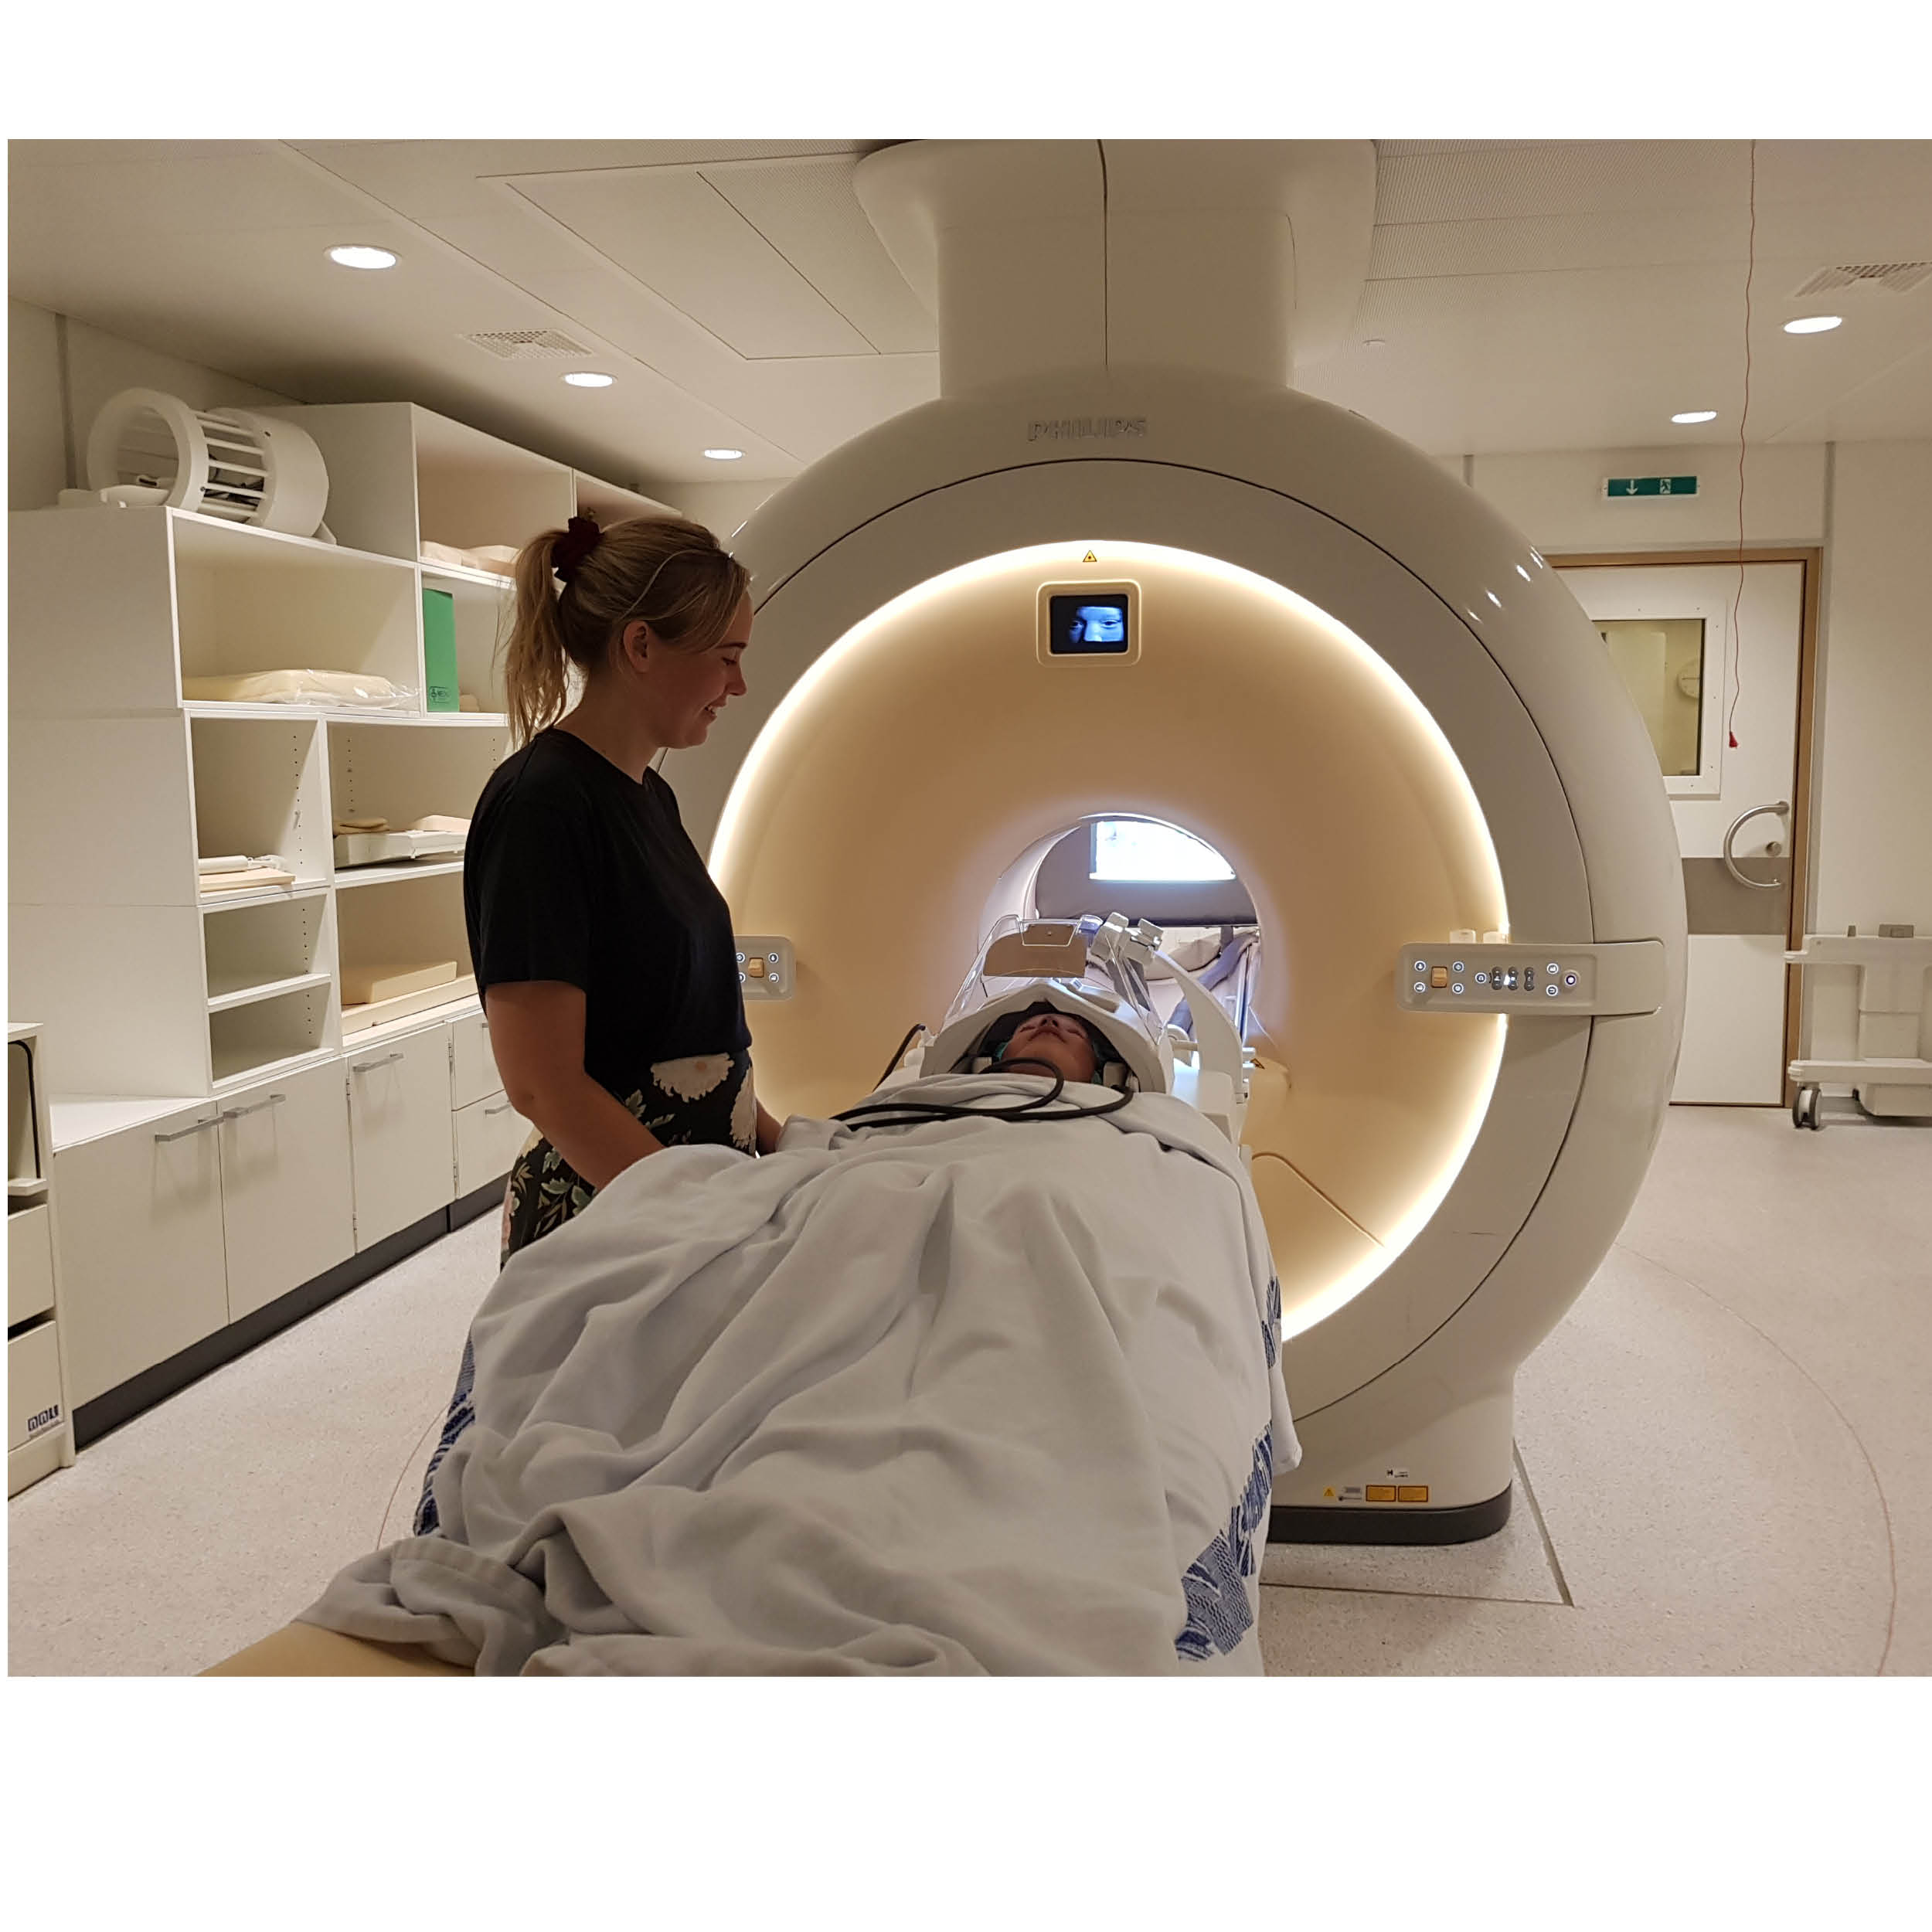
Fig2 The
children are placed comfortably and the mirror is adjusted so that they can see
the screen behind
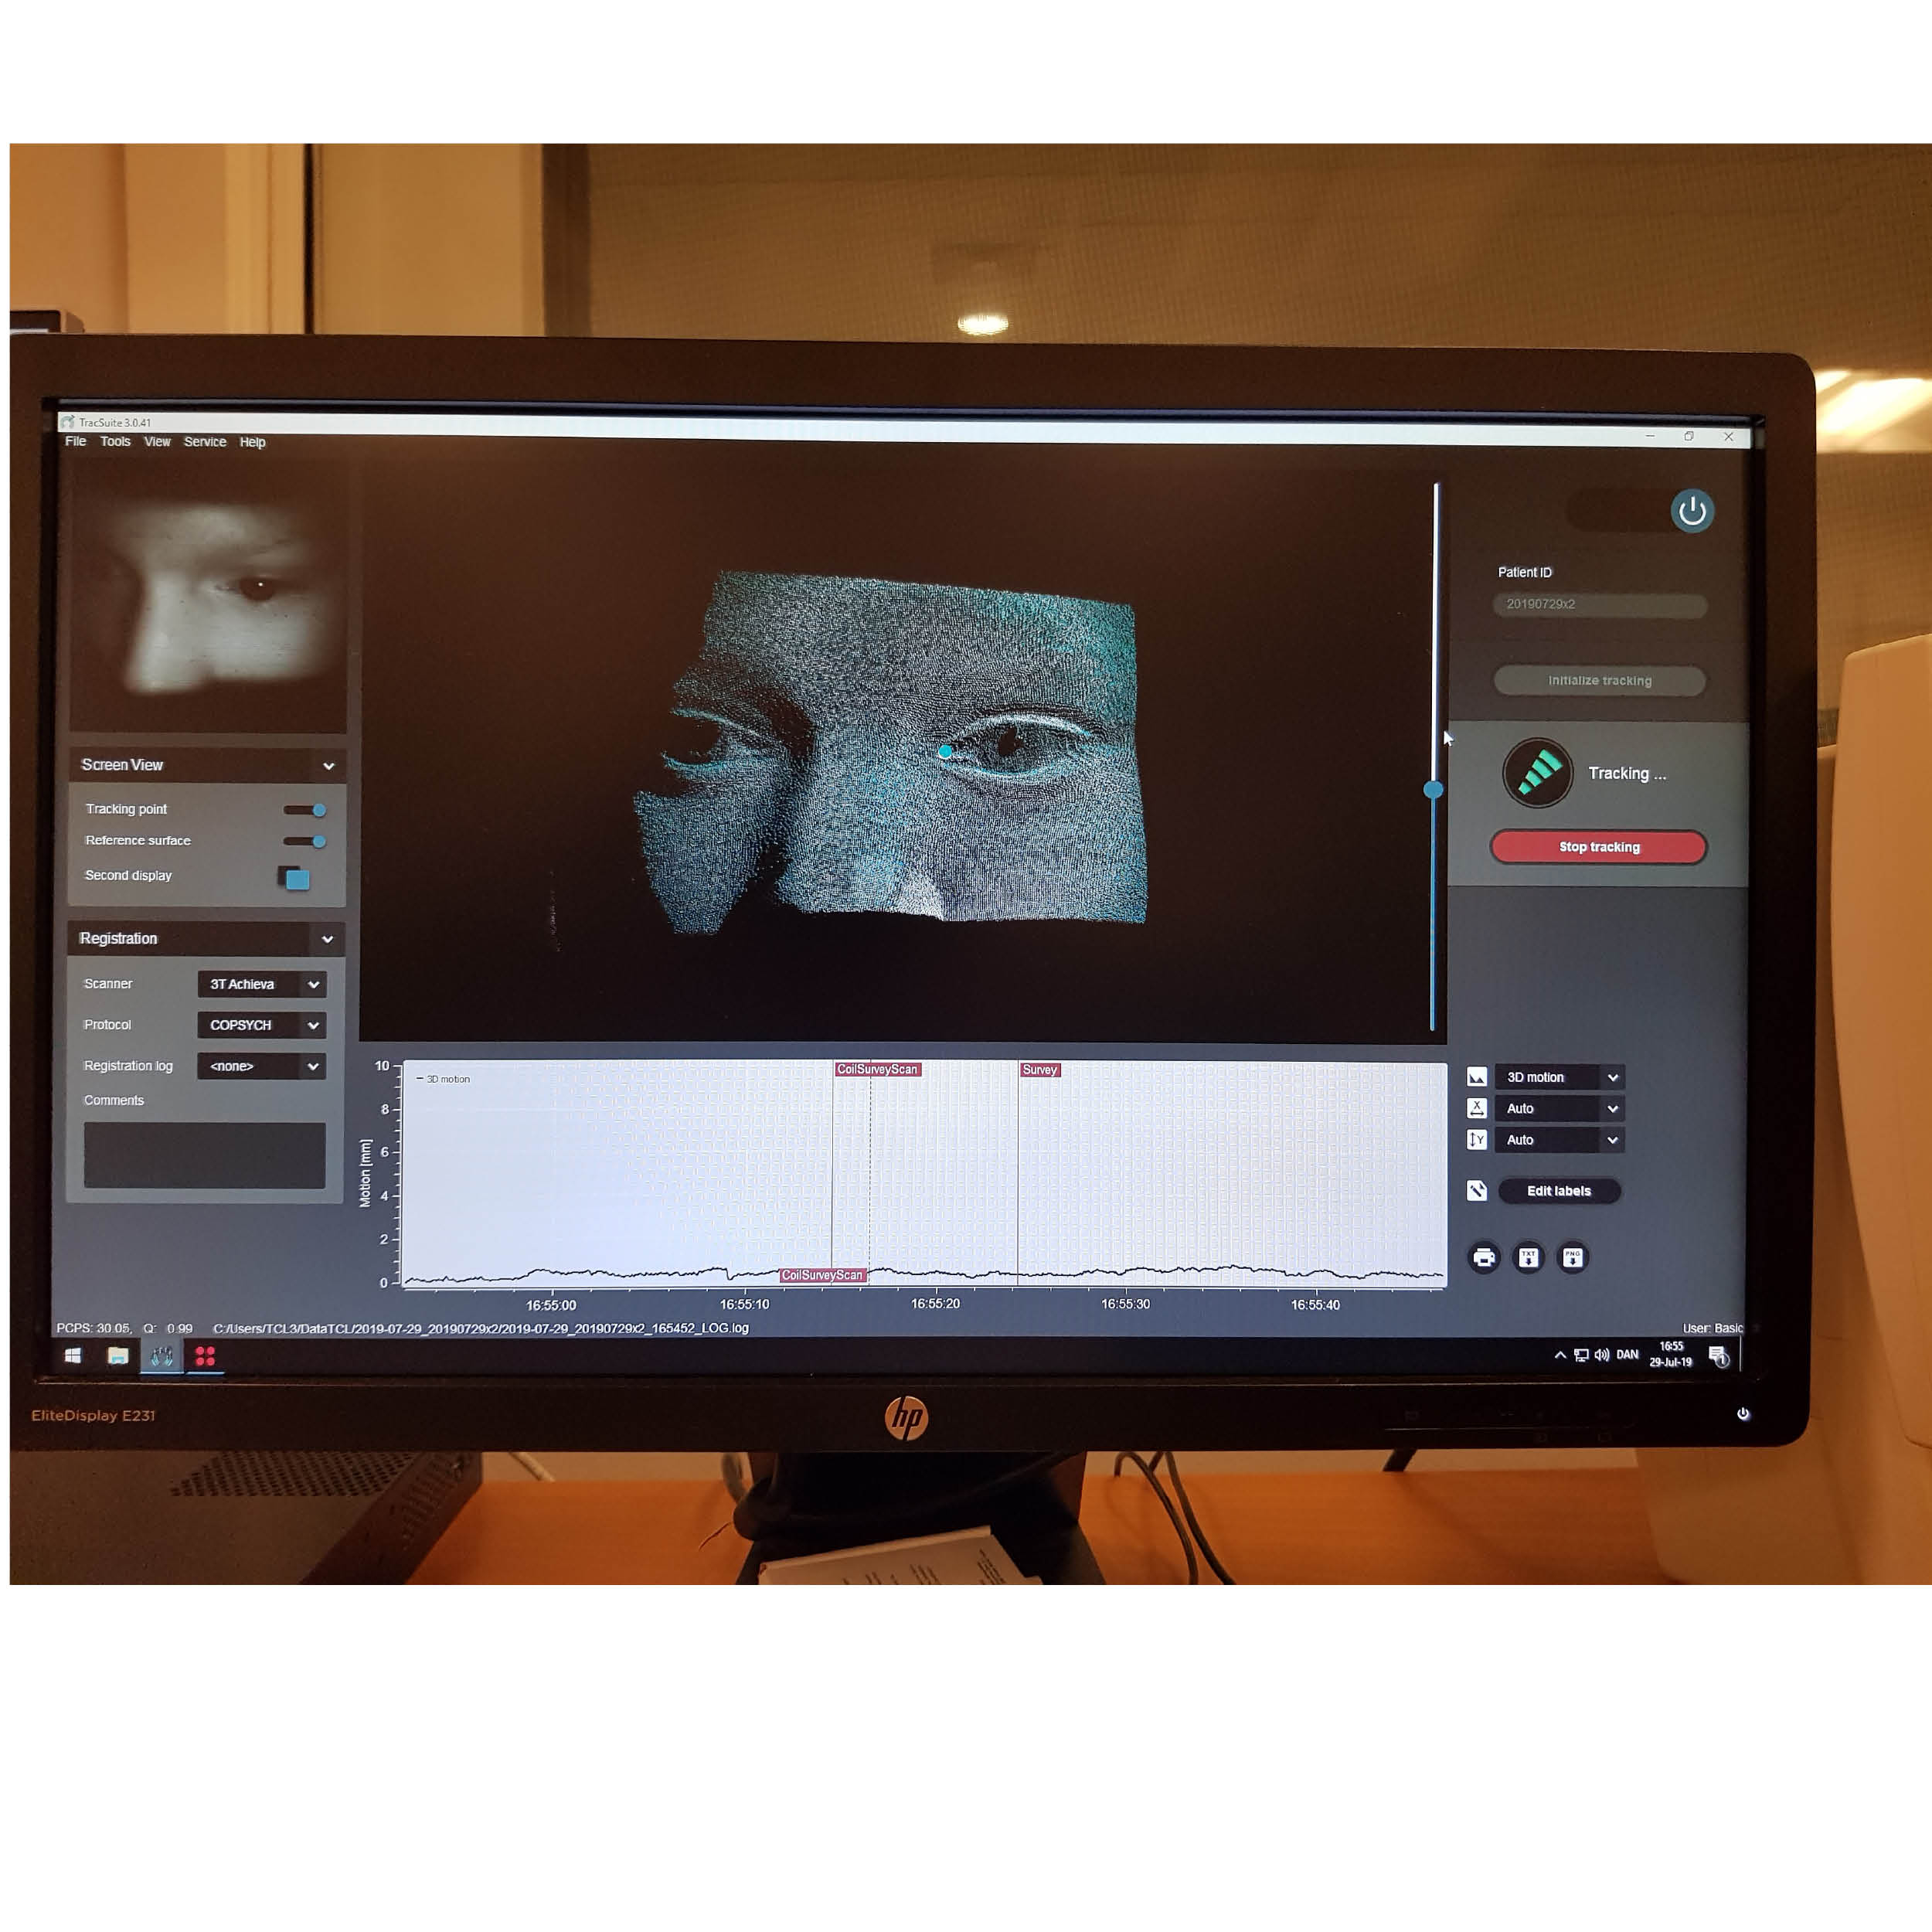
Fig. 3 Screen showing a 3D image of the child's head
and the motion curve at the bottom of the screen